Welcome to the comprehensive guide for Vent-Axia control panels, designed to optimize ventilation systems for energy efficiency and performance. This section introduces key features and setup essentials.
1.1 Overview of Vent-Axia Control Panels
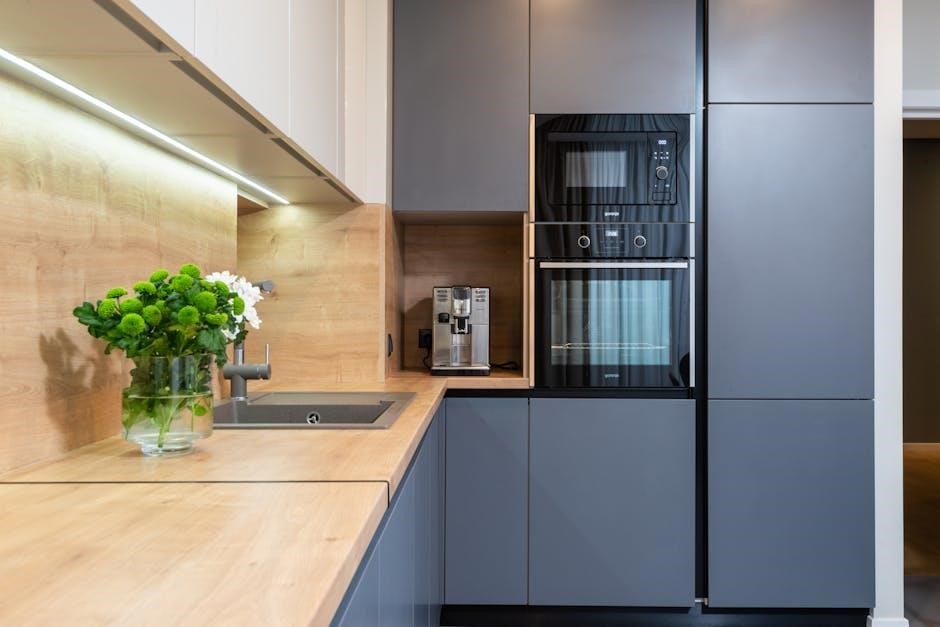
Vent-Axia control panels are central to managing ventilation systems, offering precise control over fan speeds, modes, and energy efficiency; Designed for both residential and commercial use, these panels are user-friendly and feature advanced options like LED indicators for system status and alarms. Models such as the Sentinel Kinetic B and Sentinel Kinetic 200Z/200ZH/300ZH provide tailored solutions for different ventilation needs. With integrated humidity and temperature sensors, they ensure optimal indoor air quality. The panels also support smart home integration, allowing seamless control via mobile devices. Their compact design and intuitive interface make them easy to install and operate, ensuring reliable performance and energy savings.
1.2 Importance of Proper Control Panel Setup
Proper setup of the Vent-Axia control panel is crucial for ensuring optimal performance, energy efficiency, and system longevity. Correct installation and configuration prevent issues like incorrect fan speeds or inefficient heat recovery. Improper setup can lead to breakdowns, reduced efficiency, or even safety hazards. By following the guidelines, users can ensure their ventilation system operates smoothly, maintaining indoor air quality and energy savings. Proper setup also enables advanced features like smart home integration and scheduled operations to function effectively. Always refer to the manual or consult a professional for accurate installation to avoid common mistakes and ensure reliable operation.
1.3 Key Components of the Vent-Axia Control Panel
The Vent-Axia control panel features essential components designed for precise system management. These include the remote speed control (Sentinel), which allows users to adjust fan speeds effortlessly; The panel also incorporates LED indicators to monitor system status and alarms, ensuring quick identification of issues. Additionally, it includes humidity and temperature sensors for advanced climate control. Models like the Sentinel Kinetic B and Sentinel Plus B offer integrated timers and boost modes for enhanced functionality. These components work together to provide a user-friendly interface for optimizing ventilation and heat recovery, ensuring efficient and reliable performance across various operating modes.
Installation Guidelines for Vent-Axia Control Panels
Proper installation ensures optimal performance. Begin with pre-installation checks, then follow step-by-step wiring, mounting, and ducting connections. Always refer to manufacturer guidelines for precise setup and safety.
2.1 Pre-Installation Checks
Before installing your Vent-Axia control panel, ensure all components are included and undamaged. Verify the system’s compatibility with your space and electrical setup. Check for any local building regulations or specific installation requirements. Ensure the area is clear and safe for installation. Review the manual thoroughly to understand the process. If unsure, consult a professional or refer to the Vent-Axia website for additional resources. Proper preparation ensures a smooth and successful installation process, avoiding potential issues down the line.
2.2 Step-by-Step Installation Process
Begin by carefully unboxing and organizing all components. Locate a suitable wall or surface for mounting, ensuring accessibility. Mark the mounting points and drill pilot holes if necessary. Secure the control panel using the provided hardware. Connect the wiring to the electrical supply, following the diagram in the manual. Attach the Remote Speed Control (Sentinel) if applicable. Ensure all connections are tight and insulated. Power on the system and test basic functions, such as fan speed and remote control response. Refer to the manual for specific settings and adjustments. If issues arise, consult the troubleshooting section or contact Vent-Axia support.
2.3 Wiring and Electrical Connections
Proper wiring and electrical connections are crucial for the safe and efficient operation of your Vent-Axia control panel. Always refer to the provided manual for specific wiring diagrams and instructions. Begin by disconnecting the power supply before starting any connections. Use appropriate tools like screwdrivers and pliers to securely fasten wires. Ensure all connections are tightly secured and properly insulated to prevent electrical hazards. Connect the live, neutral, and earth wires according to the diagram. If using the Remote Speed Control (Sentinel), wire it according to the manufacturer’s guidelines. After completing the connections, turn the power back on and test the system to ensure everything functions correctly. This step is essential for maintaining safety and optimal performance.
2.4 Mounting the Control Panel
Mounting the Vent-Axia control panel securely is essential for proper operation and accessibility. Choose a location with easy access, ideally near the main electrical supply. Use the provided screws or brackets to fix the panel to a wall or surface. Ensure the panel is level and firmly attached to avoid vibrations or movement. If installing in a damp or dusty environment, consider additional protection or casing. Double-check the alignment and tighten all fasteners before connecting wires or turning on the system. Proper mounting ensures long-term reliability and prevents potential damage from improper installation. Follow the manufacturer’s guidelines for specific mounting recommendations tailored to your model. This step ensures safety and optimal performance of your ventilation system.
Operating the Vent-Axia Control Panel
Operating the Vent-Axia control panel involves intuitive adjustments to fan speed, remote control usage, and monitoring LED indicators for system status. This section provides detailed guidance for seamless operation.
3.1 Turning the System On/Off
To turn the Vent-Axia system on or off, locate the primary power switch, typically found on the control panel or connected electrical supply. Ensure the unit is plugged in and the circuit breaker is active. Press the power button firmly until the LED indicator lights up, signaling activation. For shutdown, press and hold the button until the LEDs dim and the system powers down. Always refer to the manual for model-specific instructions, as some units may have varying startup/shutdown procedures. Proper power management ensures safe and efficient operation of your ventilation system.
3.2 Adjusting Fan Speed Settings
Adjusting the fan speed on your Vent-Axia control panel is straightforward. Use the designated speed control buttons, typically marked with plus (+) and minus (-) symbols, to increase or decrease fan speed. For models equipped with a remote control, such as the Sentinel series, you can adjust speeds conveniently from a distance. Some units offer preset options to save your preferred settings. Additionally, “Boost Mode” provides a temporary increase in fan speed for enhanced ventilation. Refer to your specific model’s manual for detailed instructions on utilizing these features effectively. Proper speed adjustment ensures optimal performance and energy efficiency tailored to your needs.
3.3 Using the Remote Speed Control (Sentinel)
The Sentinel remote speed control offers convenient operation of your Vent-Axia system. To use it, ensure the remote is paired with the control panel. Adjust fan speed using the slider or buttons. The remote allows seamless control from any room, enhancing comfort. For optimal functionality, keep the remote within range and avoid obstructions. Regularly check battery levels to maintain reliability. This feature is particularly useful for systems with multiple zones or hard-to-reach controls. By utilizing the Sentinel remote, you can effortlessly manage ventilation settings, ensuring energy efficiency and comfort in your home.
3.4 Understanding LED Indicators and Alarms
The Vent-Axia control panel features LED indicators and alarms to monitor system status and signal potential issues. LEDs display operational modes, such as power on, fan speed, or error states. Alarms sound when specific conditions are met, like high humidity or system malfunctions. Refer to the user manual for detailed interpretations of LED colors and alarm tones. Addressing alarm triggers promptly ensures efficient operation and prevents damage. Regular checks of LED indicators help maintain optimal performance. Understanding these signals is crucial for troubleshooting and ensuring your ventilation system runs smoothly. Always consult the manual for specific guidance on interpreting and resolving alerts. Properly managing these indicators enhances system reliability and longevity.
Maintenance and Troubleshooting
- Regularly clean filters and vents to ensure optimal airflow.
- Check for blockages in ducts and electrical connections.
- Refer to the user manual for troubleshooting common issues.
- Address alarms and LED warnings promptly to maintain efficiency.
4.1 Regular Maintenance Tasks
Regular maintenance is crucial for ensuring the Vent-Axia control panel operates efficiently. Start by cleaning filters and vents to prevent dust buildup and airflow restriction. Inspect ducts for blockages or damage, as these can disrupt system performance. Check electrical connections to ensure they are secure and free from corrosion. Additionally, review the control panel’s wiring to confirm all components are functioning correctly. Schedule periodic checks of the LED indicators to ensure they are operational, as they provide critical system status updates. Refer to the user manual for detailed cleaning procedures and maintenance schedules. Regular upkeep helps extend the lifespan of the control panel and maintains optimal ventilation performance.
4.2 Common Issues and Solutions
Common issues with Vent-Axia control panels include the fan not turning on, incorrect speed settings, or the remote control malfunctioning. For the fan not starting, check power supply and electrical connections. If the speed is incorrect, adjust settings via the control panel or remote. Remote issues may require battery replacement or signal strength checks. Alarms sounding could indicate blockages or filter issues. Regularly cleaning filters and ducts can prevent these problems. Refer to the user manual for troubleshooting guides or reset the control panel if necessary. Addressing these issues promptly ensures optimal system performance and energy efficiency.
4.3 Resetting the Control Panel
To reset the Vent-Axia control panel, locate the reset button, usually found on the underside or rear of the unit. Press and hold it for 10-15 seconds until the LED indicators flash. This process restores default settings, resolving issues like power outages or malfunctions. After resetting, the system will perform a self-test, ensuring proper operation. Note that resetting does not affect custom settings like fan speed or schedules. If issues persist, consult the user manual or contact a professional. Regular resets can help maintain optimal performance and prevent unexpected errors. Always ensure the system is powered off before attempting a reset unless specified otherwise. This step is crucial for troubleshooting and system reliability.
4.4 Cleaning the Control Panel
To maintain the functionality and appearance of your Vent-Axia control panel, regular cleaning is essential. Begin by turning off the power supply to the control panel to ensure safety. Use a soft, dry cloth to gently wipe away dust and debris from the surface. For more thorough cleaning, slightly dampen the cloth with water, but avoid excessive moisture to prevent damage. Avoid using harsh chemicals or abrasive cleaners, as they may damage the panel’s finish or harm electrical components. Pay special attention to buttons and high-touch areas. Once cleaned, allow the panel to air dry completely before restoring power. Regular cleaning helps maintain optimal performance and hygiene.

Vent-Axia Sentinel Kinetic MVHR User Instructions
The Vent-Axia Sentinel Kinetic MVHR system is designed for energy-efficient ventilation and heat recovery in homes. This section provides detailed user instructions for optimal performance and control.
5.1 Understanding the MVHR System
The Vent-Axia Sentinel Kinetic MVHR (Mechanical Ventilation with Heat Recovery) system efficiently ventilates and recovers heat from exhaust air, reducing energy loss. It integrates advanced components like heat exchangers and fans to maintain indoor air quality while minimizing heating costs. Designed for residential use, the MVHR system operates in various modes, including ventilation and heat recovery, ensuring optimal performance year-round. Proper installation, including ducting and insulation, is crucial for its efficiency. The system is controlled via the Vent-Axia control panel, offering user-friendly adjustments and monitoring. Regular maintenance ensures longevity and effectiveness, aligning with energy-saving goals.
5.2 Operating Modes (Heat Recovery, Ventilation, etc.)
The Vent-Axia Sentinel Kinetic MVHR system offers multiple operating modes to suit different ventilation needs. The Heat Recovery Mode captures warmth from exhaust air and transfers it to fresh incoming air, enhancing energy efficiency. The Ventilation Mode focuses on providing a steady airflow to maintain indoor air quality without heat recovery. Additionally, a Boost Mode increases fan speed for rapid air exchange, ideal for kitchens or bathrooms. Users can switch between modes via the control panel, ensuring optimal performance based on specific requirements. These modes are designed to balance energy efficiency, comfort, and air quality, making the system versatile for various household conditions.
5.3 Adjusting Settings for Optimal Performance
To optimize the Vent-Axia Sentinel Kinetic MVHR system, users can adjust various settings via the control panel. The fan speed can be fine-tuned using the remote control or directly on the unit, ensuring the right airflow for different conditions. The heat recovery mode can be customized to balance energy efficiency and air quality. Additionally, humidity and temperature sensors can be integrated to automatically adapt settings based on environmental changes. Regularly monitoring system performance and adjusting settings according to occupancy levels and external weather conditions can further enhance efficiency. These adjustments ensure a balanced approach to energy savings and indoor air quality, tailored to specific household needs.
5.4 Energy Efficiency Features
The Vent-Axia Sentinel Kinetic MVHR system is designed with advanced energy efficiency features to minimize energy consumption while maintaining optimal indoor air quality. The heat recovery technology ensures that warmth from exhaust air is transferred to fresh incoming air, reducing the need for additional heating. Smart sensors automatically adjust ventilation rates based on humidity and temperature levels, preventing over-ventilation and optimizing energy use. The system also includes low-power modes and intelligent airflow control, which contribute to lower energy bills. These features not only enhance performance but also align with modern energy-saving standards, making the Vent-Axia system a sustainable choice for residential ventilation needs.

Advanced Control Options
Explore smart home integration, timer scheduling, and sensor-activated controls for precise ventilation management. Boost mode and humidity sensors enhance efficiency, ensuring optimal performance and energy savings always.
6.1 Smart Home Integration
Vent-Axia control panels seamlessly integrate with smart home systems, enabling remote monitoring and control via smartphones or voice assistants. This feature allows users to adjust settings, receive notifications, and optimize energy usage. Compatibility with popular platforms ensures effortless incorporation into existing smart ecosystems. By connecting the control panel to a smart hub, homeowners can automate ventilation based on humidity levels or schedules, enhancing comfort and efficiency. This advanced functionality transforms traditional ventilation systems into intelligent, adaptive solutions tailored to modern living demands;
6.2 Timer and Scheduled Operations
The Vent-Axia control panel offers a timer function, allowing users to schedule operations for specific times. This feature ensures consistent ventilation without manual intervention. By programming the timer, homeowners can automate fan speed adjustments, boost modes, or system shutdowns. Scheduled operations enhance energy efficiency by running the system only when needed, reducing unnecessary energy consumption. Users can set daily or weekly schedules to maintain optimal indoor air quality. This feature is particularly useful for balancing ventilation needs with lifestyle routines, ensuring a healthy and comfortable environment while minimizing energy waste. The timer function is easy to configure via the control panel or remote interface.
6.3 Humidity and Temperature Sensors
Vent-Axia control panels are equipped with advanced humidity and temperature sensors, enabling automatic system adjustments. These sensors monitor indoor conditions, ensuring optimal ventilation and energy efficiency. By detecting moisture levels, they prevent condensation and mold growth, while temperature sensors maintain a comfortable environment. The system can activate boost mode during high humidity or extreme temperatures, enhancing performance. These sensors integrate seamlessly with other control features, providing a responsive and adaptive ventilation solution. They are essential for maintaining indoor air quality and reducing energy consumption, making them a key component of the Vent-Axia system. Proper calibration ensures accurate readings and reliable operation. Regular maintenance is recommended to sustain sensor accuracy.
6.4 Boost Mode Activation
Boost Mode on Vent-Axia control panels enhances ventilation performance during high-demand scenarios. Activated manually or automatically via sensors, it increases fan speed to rapidly remove excess moisture or pollutants. This feature is ideal for kitchens and bathrooms, preventing condensation and improving air quality. Automatic activation occurs when humidity or temperature thresholds are exceeded, ensuring efficient operation without manual intervention. Boost Mode can be programmed via timers or smart home integration, offering flexibility and convenience. It complements energy-efficient operation by providing on-demand power, ensuring optimal ventilation while minimizing energy usage. Regular use of Boost Mode helps maintain a healthy indoor environment and prolongs system lifespan. Proper setup ensures seamless functionality and energy savings.

Vent-Axia Control Panel Models
Vent-Axia offers a range of control panel models, including Sentinel Kinetic B, Sentinel Kinetic 200Z/200ZH/300ZH, and Sentinel Plus B, each designed for specific ventilation needs and applications.
7.1 Sentinel Kinetic B
The Sentinel Kinetic B is a high-performance control panel designed for advanced ventilation systems. It features intuitive controls, energy-efficient operation, and seamless integration with MVHR units. The panel includes a user-friendly interface with LED indicators for system status and alarms. It supports remote speed control via the Sentinel device, allowing users to adjust fan speeds effortlessly. The Sentinel Kinetic B is ideal for residential and light commercial applications, ensuring optimal airflow and heat recovery. Regular maintenance, such as cleaning filters and checking wiring, is essential for sustained performance. This model is known for its reliability and compatibility with various ducting configurations, making it a popular choice among installers and homeowners alike.
7.2 Sentinel Kinetic 200Z/200ZH/300ZH
The Sentinel Kinetic 200Z, 200ZH, and 300ZH are advanced control panels designed for MVHR systems, offering superior energy efficiency and performance. These models feature humidity and temperature sensors, enabling smart operation. The 200ZH and 300ZH include integral humidity control, while the 200Z provides a cost-effective solution. All models support boost mode for increased airflow and integrate seamlessly with Vent-Axia’s remote speed control. They are ideal for larger properties and require proper ducting insulation for optimal functionality. Regular maintenance, such as filter cleaning, ensures longevity. These panels are highly praised for their reliability and adaptability, making them a top choice for modern ventilation needs.
7.3 Sentinel Plus B
The Sentinel Plus B is a high-performance control panel designed for Vent-Axia’s MVHR systems, offering advanced features like intelligent humidity control and energy-efficient operation. It features a sleek interface with easy-to-use controls, making it ideal for homeowners seeking a balance between functionality and aesthetics. The Sentinel Plus B supports multiple operating modes, including heat recovery and ventilation, and is compatible with remote speed control for added convenience. With its robust design and user-friendly navigation, this model is a popular choice for modern homes. Regular maintenance, such as cleaning filters, ensures optimal performance and extends system lifespan, making it a reliable option for long-term use.
7.4 Other Models and Variations
Beyond the Sentinel Kinetic and Plus series, Vent-Axia offers a range of other models tailored to specific needs. These include compact designs for smaller spaces and units with advanced smart features. Some models incorporate additional sensors for temperature and humidity, enhancing performance. Others focus on energy efficiency, with features like eco-mode operation. Each variation is built to integrate seamlessly with existing ducting systems, ensuring flexibility for various installations. Whether for residential or light commercial use, these models provide reliable control and customization options, making them suitable for diverse ventilation requirements. Regular updates and improvements ensure they meet the latest standards in home comfort and energy savings.
Ducting and Insulation Guidelines
Proper ducting installation ensures efficient airflow, while insulation prevents heat loss. Follow Vent-Axia guidelines for securing ducts and insulating them, avoiding common installation mistakes for optimal performance.
8.1 Proper Ducting Installation Techniques
Proper ducting installation is crucial for efficient airflow and system performance. Ensure ducts are securely fastened to the Vent-Axia unit and walls to prevent leaks or damage. Use approved materials like flexible or rigid ducting, depending on the system requirements. Avoid sharp bends or kinks, as they can restrict airflow. Secure ducts with clamps or brackets, and seal joints with tape or mastic for airtight connections. Properly align ducts to maintain consistent airflow and reduce noise. Follow Vent-Axia guidelines for horizontal and vertical installations, and ensure ducts are insulated in unheated areas to prevent heat loss. Regularly inspect ducts for damage or blockages.
8.2 Insulation Requirements for Ducts
Proper insulation of ducts is essential to maintain energy efficiency and prevent heat loss. In unheated areas, such as garages or lofts, ducts should be insulated to avoid condensation and ensure optimal airflow. Use high-quality insulation materials like fiberglass or foam to cover exposed ducts, especially in colder environments. Insulation thickness should meet local building regulations to provide adequate thermal protection. Ensure all joints and connections are sealed tightly to prevent air leaks, which can compromise insulation effectiveness. Regularly inspect insulation for damage or gaps, especially in areas prone to moisture. Properly insulated ducts enhance system performance and reduce energy consumption. Always follow Vent-Axia’s recommendations for insulation materials and installation practices.
8.3 Avoiding Common Ducting Mistakes
To ensure optimal performance, avoid common ducting errors such as incorrect sizing, poor layout, or sharp bends that restrict airflow. Always use Vent-Axia-approved materials and follow installation guidelines. Insufficient insulation in unheated areas can lead to condensation and reduced efficiency. Ensure ducts are securely fastened to prevent sagging, which can cause damage or leaks. Avoid overcomplicating duct routes, as this can increase resistance and reduce system effectiveness. Regularly inspect ducts for damage or blockages, addressing issues promptly to maintain performance. Proper installation and maintenance are crucial for achieving the energy efficiency and airflow Vent-Axia systems are designed to deliver.
Proper installation and regular maintenance are key to optimal performance. Always consult the manual and manufacturer guidelines for specific models. Ensure all ducting is correctly insulated and sized. Regularly check for software updates to enhance functionality. For advanced features, refer to the Vent-Axia website or authorized dealers. Following these tips ensures energy efficiency, reliability, and longevity of your system. If unsure, consult a certified professional for assistance.
9.1 Summary of Key Instructions
Ensure proper installation by following pre-installation checks and wiring guidelines. Regular maintenance, such as cleaning and inspecting components, is essential for optimal performance. Use the Remote Speed Control (Sentinel) for easy fan speed adjustments. Refer to the manual for specific model instructions, like the Sentinel Kinetic B or Plus B. Always insulate ducts and avoid common installation mistakes. Utilize energy-efficient features and advanced control options like smart home integration. For troubleshooting, reset the control panel if necessary. Consult certified professionals for complex issues. Visit www.vent-axia.com for additional resources and updates. Adhere to these guidelines for long-term efficiency and reliability.
9.2 Best Practices for Long-Term Use
For long-term efficiency, ensure regular maintenance, including cleaning filters and inspecting ducts. Always follow the manufacturer’s guidelines for installation and operation. Proper insulation of ducts in unheated areas is crucial to prevent heat loss. Utilize energy-efficient features like heat recovery and smart home integration to optimize performance. Schedule regular system checks to identify and address potential issues early. Keep the control panel clean and free from dust to ensure accurate sensor readings. Explore advanced features like timer functions and humidity sensors to tailor the system to your needs. For complex adjustments or repairs, consult certified professionals to maintain warranty validity and system integrity. Refer to the official Vent-Axia website for updates and additional support.
9.3 Resources for Further Assistance
For additional support, visit the official Vent-Axia website at www.vent-axia.com for detailed manuals, troubleshooting guides, and product-specific instructions. Download user manuals for models like the Sentinel Kinetic B or Sentinel Plus B directly from their website. Contact Vent-Axia customer support for personalized assistance. Refer to the Vent-Axia blog for tips on optimizing your system. Engage with certified installers or HVAC professionals for complex issues. Explore community forums and review sections for user experiences and solutions. Ensure all repairs are conducted by professionals with NiCEIC certification for compliance and safety.