No-sew fleece blankets are a popular DIY project, perfect for all skill levels, especially beginners. They require minimal supplies and no sewing skills, making them accessible to everyone. With a printable PDF guide, you can easily follow step-by-step instructions to create a cozy, personalized blanket. This project is great for gifts, donations, or keeping yourself warm. The no-sew method ensures a quick and enjoyable crafting experience for anyone.
1.1 Overview of the Project
A no-sew fleece blanket is a simple, fun, and creative DIY project that requires minimal tools and no sewing skills. It involves cutting and tying fleece fabric to create a cozy blanket. The project is perfect for beginners and can be completed quickly with basic supplies like scissors and high-quality fleece. Instructions are easy to follow, and customizable options allow you to choose colors, patterns, and sizes to suit your needs. This project is ideal for gifts, charity donations, or personal use, making it a versatile and rewarding activity for all ages.
1.2 Benefits of Making a No-Sew Fleece Blanket
Making a no-sew fleece blanket offers numerous benefits, including its simplicity and accessibility for all skill levels. It requires minimal supplies and no sewing skills, making it a great project for beginners or children with adult supervision. The blankets are quick to create, customizable with various colors and patterns, and provide a sense of accomplishment. They also make thoughtful gifts or donations, spreading warmth and comfort. Additionally, the process is cost-effective and environmentally friendly, allowing for creative reuse of materials while enjoying a cozy, handmade result.
Materials and Supplies Needed
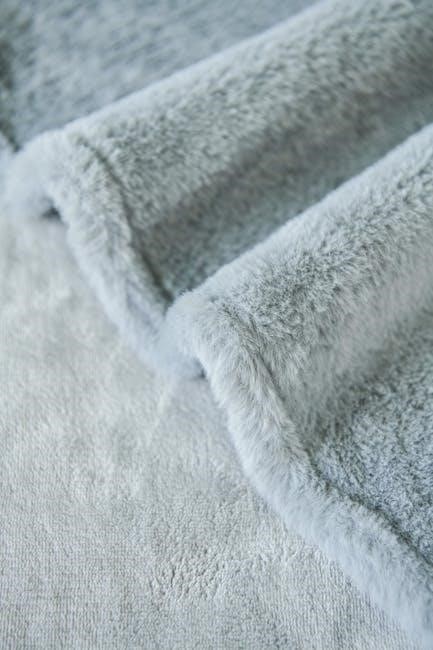
Essential supplies include high-quality fleece fabric, sharp scissors, a ruler, and a cutting mat. Optional tools like a rotary cutter and masking tape can aid precision and ease.
2.1 Basic Supplies
The fundamental supplies for a no-sew fleece blanket include high-quality fleece fabric, available in various colors and patterns. For a standard blanket, you’ll need two coordinating pieces of fleece, each measuring 1.5 to 2 yards. A sharp pair of scissors is essential for cutting accurately. Additionally, a ruler or measuring tape is necessary to ensure straight cuts and even fringes. A cutting mat or flat surface protects your work area and helps maintain precision. These basic supplies are readily available at craft stores or online, making the project accessible and straightforward.
2.2 Optional Supplies for Customization
For added customization, consider using a rotary cutter and cutting mat for precise cuts, or masking tape and chalk for guided measurements. Fabric labels or personalized tags can add a unique touch. Optional tools like a ruler or 4-square corner tracers help achieve neat edges. While these supplies enhance the project, they are not essential, allowing you to customize based on your preferences and available resources. These optional items can make your blanket more personalized and professionally finished without complicating the process.
Step-by-Step Instructions
Create a cozy no-sew fleece blanket by following these simple steps. Prepare the fabric, cut to size, create fringe, tie knots, and finish the edges neatly.
3.1 Preparing the Fleece Fabric
Begin by laying the fleece fabric flat on a large, stable surface. Trim any uneven edges or selvage using sharp scissors or a rotary cutter for a clean finish. Ensure the fabric is squared by aligning the edges evenly. If using patterned fleece, position the design centered for a balanced look. Remove any excess fabric that extends beyond the desired size. Optionally, use a cutting mat and ruler for precision. This step ensures a professional appearance and makes the subsequent steps easier to execute.
3.2 Cutting the Fabric to Size
Once the fleece is prepared, use sharp scissors, a rotary cutter, or a craft knife to cut it to the desired size. Trim off the selvage edges to prevent fraying. For a standard blanket, cut the fabric into a square or rectangle, ensuring all corners are square. If using a template or pattern, align it carefully before cutting. For accuracy, place masking tape along the cutting lines as a guide. Cut slowly and evenly to maintain straight edges. This step ensures the blanket is uniform and ready for fringe creation.
3.3 Creating the Fringe
To create the fringe, cut 1-inch wide strips along all four sides of the fleece, spaced evenly apart. Use sharp scissors or a rotary cutter for clean cuts. Start by cutting 4-inch squares from each corner to avoid bulky edges. Then, slice strips from the edge to the marked line, ensuring they are uniform in width. For accuracy, place masking tape 4 inches from the edge as a guide. Cut carefully to maintain straight lines. Avoid tying fringe strips together, as this can cause bunching. Even spacing and consistent cuts ensure a professional finish.
3.4 Tying the Knots
To tie the knots, bring one fringe strip from the front and one from the back together, looping them around each other. Secure the knot close to the edge to create a neat finish. Ensure the knots are tight to prevent fraying. Work methodically around the blanket, tying each pair of strips. For consistency, tie knots at the same spacing and tension. This step requires patience but results in a durable and visually appealing fringe. Double-check each knot to ensure it’s secure and evenly spaced for a professional look.
3.5 Finishing the Edges
Once the knots are tied, inspect the edges to ensure they are secure and evenly spaced. Trim any excess fringe or uneven ends with scissors for a polished look. This step ensures the blanket has a clean, professional finish. Gently tug on the knots to tighten them if needed. For added neatness, fold the fringe inward and smooth out the fabric. This final step completes the blanket, leaving it soft, cozy, and ready for use or gifting. Properly finishing the edges enhances the blanket’s durability and appearance.
Tips for Accuracy and Neatness
Use a template for precise cutting and ensure even fringe by measuring strips carefully. This helps maintain a uniform appearance and professional finish for your blanket.
4.1 Using a Template for Cutting
Using a template ensures precise cutting and consistency. Trace a cardboard or plastic template onto the fleece to mark straight lines or uniform fringes. Secure the template with masking tape to prevent shifting. Cut slowly and carefully along the edges, maintaining even pressure. This method is especially helpful for intricate designs or patterns. For fringed edges, use a ruler or measuring tape to mark equal intervals before cutting. This ensures a neat and professional-looking finish. Templates are reusable, making them ideal for multiple projects or group activities. Always double-check measurements before cutting to avoid errors.
4.2 Ensuring Even Fringe
To achieve even fringe, measure and mark the fleece edges at consistent intervals. Cut 1-inch wide strips along the perimeter, using a ruler or measuring tape for accuracy. For a professional finish, ensure the fringe length is uniform on all sides. To avoid unevenness, cut slowly and maintain steady pressure. Tying knots correctly is also crucial—use one strip from the front and one from the back to create a neat, balanced look. This method prevents bulkiness and ensures a polished appearance. Always double-check your cuts before tying knots for the best results.
Safety Considerations
Always handle scissors safely, keeping them out of children’s reach. Ensure adult supervision when involving kids in cutting or handling sharp tools. Store supplies securely after use.
5.1 Working with Scissors Safely
Always use sharp, dedicated scissors for cutting fleece to avoid accidents. Keep scissors out of children’s reach and ensure adult supervision when involving kids. Use a stable, flat surface for cutting, and avoid overreaching. Store scissors securely after use. Consider using blunt-tipped scissors for younger participants. Ensure good lighting to maintain visibility while cutting. Regularly inspect scissors for damage and replace them if necessary; Organize your workspace to prevent tripping hazards. Stay focused and avoid distractions while handling sharp objects.
5.2 Tips for Involving Children
Engaging children in making no-sew fleece blankets can be a fun and educational experience. Assign age-appropriate tasks, such as selecting fabrics or tying knots, while ensuring adult supervision. Use child-safe scissors or blunt-tipped tools for younger participants. Break the project into smaller steps to maintain their interest and patience. Encourage creativity by letting them choose patterns or colors. Provide clear, simple instructions and positive reinforcement to build confidence. This activity fosters teamwork and a sense of accomplishment, making it a great family or group project for kids.
Variations and Customization Ideas
Customize your no-sew fleece blanket with creative edge finishes like knots, fringe, or bows. Add embellishments such as appliques or iron-on designs for a personalized touch.
6.1 Different Edge Finishes
A no-sew fleece blanket offers various edge finishes to enhance its appearance. Popular options include tying knots, creating fringe, or adding bows. For a cleaner look, opt for a simple straight cut or a braided edge. These finishes not only add style but also prevent fraying, ensuring durability. You can choose one method or combine techniques for a unique design. Each finish is easy to achieve without sewing, making it perfect for all skill levels. This versatility allows you to personalize your blanket, ensuring it matches your desired aesthetic or recipient preferences.
6.2 Adding Embellishments
Embellishments can add a personal touch to your no-sew fleece blanket. Consider using iron-on patches, fabric paint, or appliques to create unique designs. Ribbons, bows, or decorative tape can also enhance the blanket’s appearance. For a personalized feel, add custom labels or embroidered names. These embellishments are easy to apply without sewing, allowing you to express your creativity. Ensure any additions are securely attached to withstand regular use. This step lets you transform a simple blanket into a thoughtful, one-of-a-kind gift or keepsake.
Donation and Gifting Ideas
No-sew fleece blankets make thoughtful donations for charities, shelters, or those in need. They also serve as personalized gifts for loved ones, offering warmth and comfort.
7.1 Donating to Charity
No-sew fleece blankets are a heartfelt donation for charities, shelters, and organizations supporting those in need. They provide warmth and comfort to children, homeless individuals, and families in crisis. Many charities, like Project Linus, accept these blankets to distribute to hospitalized children or those affected by disasters. Consider donating to local shelters, hospitals, or community centers. Your handmade blanket can bring joy and warmth to someone during a challenging time, making it a meaningful way to give back to your community.
7.2 Personalized Gifts
A no-sew fleece blanket makes a thoughtful and personalized gift for loved ones. You can customize it by choosing fabrics that match their favorite colors or patterns. Adding a name, initials, or a special message using iron-on transfers or fabric paint can make it extra meaningful. These blankets are perfect for birthdays, holidays, or baby showers. They also serve as a cozy gift for new homeowners or as a heartfelt present for friends and family. The ease of making them ensures a unique and touching gift that shows you care.
Community and Group Projects
Organizing a group project to make no-sew fleece blankets fosters teamwork and camaraderie. Schools, clubs, or charities can collaborate, making it a fun and impactful community activity.
8.1 Organizing a Blanket-Making Event
Organizing a no-sew fleece blanket-making event is a great way to bring people together for a meaningful cause. Start by planning the date, location, and materials needed. Recruit volunteers and assign tasks like cutting fleece, tying knots, or coordinating supplies. Provide step-by-step instructions or demonstrations to ensure everyone understands the process. Consider partnering with local schools, clubs, or charities to amplify the impact. These events not only produce warm blankets for those in need but also foster teamwork and camaraderie among participants. Make it fun by adding music, snacks, or small prizes to keep everyone engaged!
8.2 Involving Schools or Clubs
Involving schools or clubs in no-sew fleece blanket projects is a fantastic way to engage students and promote community service. Many organizations encourage youth participation, as it teaches teamwork and empathy. Schools can integrate the project into art, home economics, or service-learning classes. Clubs like Girl Scouts or 4-H often adopt such projects to foster skill-building and charity work. Students can help with measuring, cutting, and tying knots, while learning about fabric types and textures. This hands-on activity also introduces them to the joy of creating something meaningful for others. Encourage schools or clubs to donate finished blankets to local shelters or charities, reinforcing the value of giving back to the community. Provide clear instructions and supervision to ensure a successful and enjoyable experience for all participants. Recognition for their efforts, such as certificates or thank-you notes, can further motivate involvement. This collaborative effort not only produces warm blankets but also nurtures a sense of social responsibility among young people.

Resources and Printable Guides
Access printable PDF guides and video tutorials for no-sew fleece blankets on platforms like JillsBlankets.org and Instructables.com. These resources provide step-by-step instructions, making it easy for all skill levels to create cozy blankets.
9.1 Printable PDF Instructions
Printable PDF guides provide clear, step-by-step instructions for making no-sew fleece blankets. These guides, available on websites like JillsBlankets.org and Instructables.com, include visuals and detailed directions. They cover measuring, cutting, and tying techniques, ensuring a professional finish. Many PDFs are designed for beginners, offering tips for customizing sizes and patterns. Some guides even include templates for fringe and corner cuts. With a PDF, you can easily follow along and create a cozy blanket without sewing. These resources are perfect for ensuring accuracy and confidence in your DIY project.
9.2 Video Tutorials for Visual Learners
Video tutorials are an excellent resource for visual learners, offering a detailed, step-by-step guide to making no-sew fleece blankets. Platforms like YouTube and crafting websites provide high-quality tutorials that demonstrate techniques such as cutting fringe, tying knots, and finishing edges. These videos allow learners to pause, rewind, and follow along at their own pace, ensuring clarity and understanding. Many tutorials are designed for beginners, making the process straightforward and enjoyable. They complement printable PDF instructions, offering a dynamic way to master the craft and achieve professional-looking results.
Troubleshooting Common Mistakes
Common mistakes include uneven knots or incorrect fringe length. To fix, adjust knots by tightening or loosening, and trim excess fringe for a polished finish.
10.1 Fixing Uneven Knots
If your knots are uneven, gently assess each one and adjust as needed. Untie any loose or uneven knots and re-tie them securely, ensuring consistency across the blanket. Work carefully to avoid tightening too much, which can pucker the fabric. Use sharp scissors to trim any excess fringe that may have caused unevenness. By systematically addressing each knot, you can achieve a uniform and professional-looking finish. This step ensures your blanket remains visually appealing and cozy for years to come.
10.2 Adjusting Fringe Length
To adjust fringe length on your no-sew fleece blanket, start by assessing the current fringe for evenness. If some sections are longer than others, untie the knots in those areas. For a shorter fringe, carefully trim the excess fleece with sharp scissors, ensuring not to cut the knots. After trimming, re-tie the knots securely. For a longer fringe, you may need to cut additional strips, but this is less common. Use a ruler or guide to measure and achieve consistent lengths. Work methodically to maintain a neat appearance, and consider using sharp tools to prevent fraying. This process ensures your blanket’s fringe looks uniform and well-finished, enhancing its overall aesthetic appeal.
Creating a no-sew fleece blanket is a fun and rewarding project. With patience and attention to detail, you’ll craft a cozy blanket to treasure or share. Happy crafting!
11.1 Encouragement for First-Time Makers
Embrace the joy of creating a no-sew fleece blanket, even if you’re new to DIY projects! This craft is perfect for all skill levels and requires no special tools or expertise; With clear instructions and minimal supplies, you can craft a cozy blanket that’s both functional and meaningful. Don’t hesitate to experiment with colors and patterns to add a personal touch. Remember, it’s okay to make small mistakes—they often add character. Take pride in your handmade creation, knowing it will bring warmth and comfort to whoever receives it. Happy crafting!
11.2 Sharing Your Experience
Sharing your no-sew fleece blanket-making experience can inspire others to try this rewarding craft. Post your creations on social media using hashtags like #NoSewBlanket or #DIYCrafts to connect with fellow makers. Hosting a crafting gathering or teaching others can also spread the joy. Consider donating your blankets to charities or shelters, where they bring warmth and comfort. Sharing tips, photos, and stories online can help others learn and gain confidence. Your creativity and kindness can make a meaningful impact, fostering a sense of community and encouraging others to embrace this fun, easy project.